In the artwork graphics design of Adobe Photoshop, people search How to Put Text Behind an Object in Photoshop. The Philippines Photo Editor website experts give you the Photoshop tutorial meticulously. In that case, when you are a beginner at learning about Photoshop that time you ask like this. There, the Philippines Photo Editor Websites graphics designers give you an easy process. Our designers will be professional and their work is so accurate and perfective. That is why we suggest first visiting our photoeditorph.com website and look our front samples. Then, you can depend on us after sureness of our artwork in Photoshop. Now, go to
The Process for How to Put Text Behind an Object in Photoshop.
First Step- Open an image that can download from Adobe stock and set it Adobe Photoshop. Then, go to start about How to Put Text behind an Object in Photoshop. The second step- Add to text and then go to the image and position it in front of the object. Now, turn the text on in the image by clicking the type layer visibility icon. The third step- Duplicate the background layer that sits on the background layer with back in the layer panel.
The fourth step- Drag the copy above the type layer because you need a new layer above the layer panel. That is why select the “Background Copy” and drag the layer of the Type layer. We are here staying in the process of the middle of How to Put Text Behind an Object in Photoshop. The fifth step- here, you need to choose the quick selection tool and it to choose from the toolbar. Even, it is viewing the selection in a quick mask mood. The sixth step- in this step you need to follow refines the selection with select and mask. Buy our Image Masking Service at a low price.
The Seventh Step- There You Need to Go for Changing the View Mode.
All in all, in the select with mask workspace need to refine the edge dialog box so click view mode. Also then create a changing mode with smoothing out the edges. The Eighth step- output the selection as a layer mask and you are already doing all processes. Moreover, there we do clean up the selection. After then, the final step is to output the selection back into Photoshop as a layer mask. There, you must understand How to Put Text behind an Object in Photoshops.
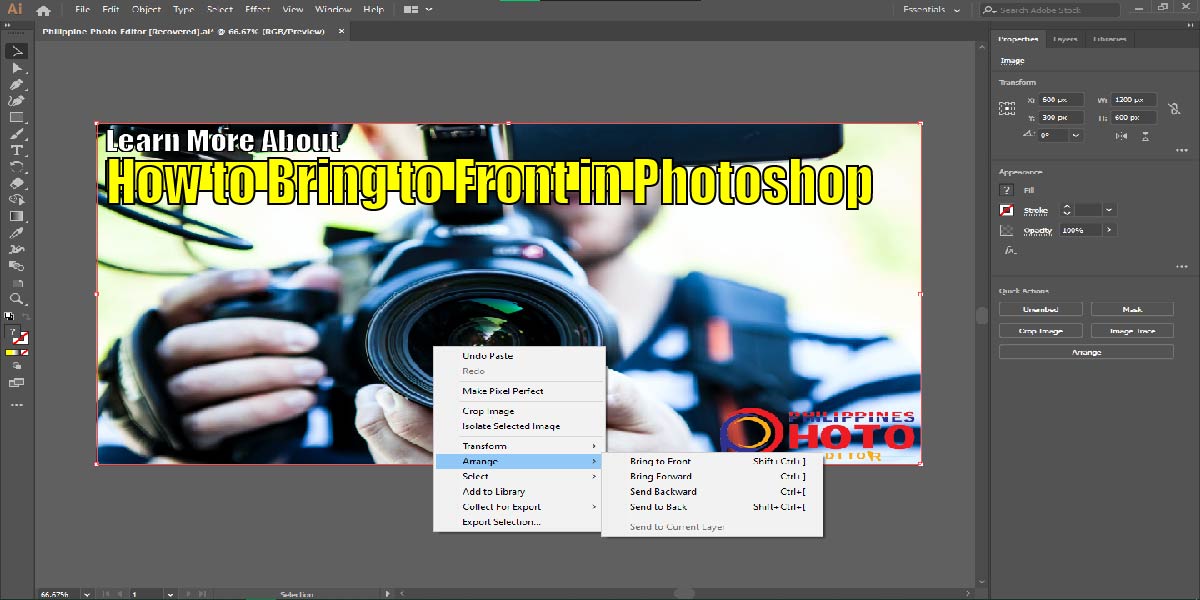
In conclusion, the Philippines Photo Editor maybe clear upper you to how to put Text behind an Object in Photoshops. If you have any questions about the How to Put Text behind an Object in Photoshop then can contact our customer team. They are active 24 hours a day for the clients’ urgency including How to Put Text behind an Object in Photoshops. Learn about How to Bring to Front in Photoshop and happy this trick in your ongoing project